

Have you ever looked up at a beautiful Moon, taken a picture with your phone, and ended up with nothing more than a tiny white dot? You are not alone. Photographing the Moon with a smartphone can be surprisingly difficult, even when it looks bright and clear in the night sky.
The good news is that you do not need an expensive camera or professional photography equipment to take a better Moon picture. With the right camera settings, a steady hand, and a few simple techniques, you can capture a sharper image with an iPhone or Android phone.
In this guide, you will learn how to photograph the Moon with a phone, which camera settings to try, how to reduce brightness, when to use zoom, and how to avoid common mistakes. These practical moon photography tips work with many modern smartphones, although the available features vary by model.
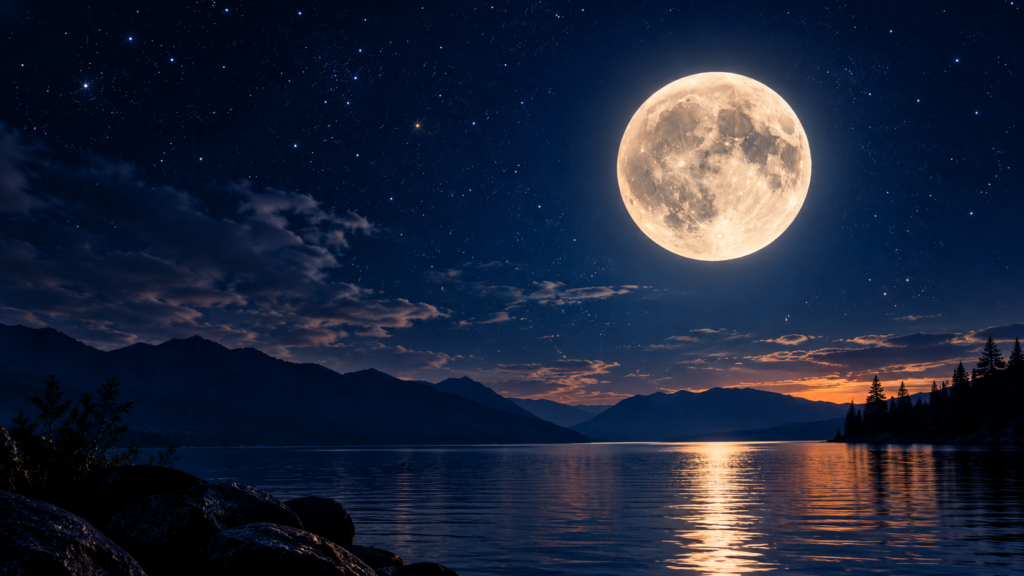
Why Does the Moon Look Small or Overexposed in Phone Photos?
The Moon looks much larger to our eyes than it often appears in smartphone pictures. There are several reasons for this.
First, the Moon is extremely far away. Your phone’s standard camera captures a wide area of the sky, making the Moon appear small in the frame.
Second, the Moon is illuminated by sunlight. Although the surrounding sky may be dark, the lunar surface is bright. Your phone’s automatic camera settings may try to brighten the entire scene, causing the Moon to appear as a featureless white circle.
Finally, even a slight movement can make a highly zoomed image look blurry. Haze, thin clouds, autofocus problems, and excessive digital zoom can also reduce image quality.
The solution is simple: focus on the Moon, reduce the exposure, stabilize your phone, and use zoom carefully.
Best Camera Settings for Photographing the Moon
Before taking your first picture, adjust the settings you can access in your phone’s camera app.
Here is a useful starting point.
| Camera setting | Recommended approach |
|---|---|
| Flash | Turn it off |
| Focus | Tap the Moon and lock focus if available |
| Exposure | Reduce brightness until lunar details become visible |
| Zoom | Use optical zoom or a dedicated telephoto lens when available |
| Night mode | Turn it off or reduce its effect if it overexposes the Moon |
| HDR | Test both settings if your phone offers the option |
| Timer | Use a 2- or 3-second timer |
| Stabilization | Use a tripod or steady surface |
| Image format | Use RAW if supported and you plan to edit |
These are starting points, not universal rules. Your results will depend on your phone, the Moon’s phase, atmospheric conditions, and the camera app.
1. Reduce the Exposure
This is one of the most important steps in Moon photography.
Open your camera app and point it at the Moon. Tap the Moon on the screen to help the camera focus on the subject. If an exposure slider appears, move it downward until the Moon stops looking completely white.
You want the lunar surface to appear gray, with visible light and dark areas.
Do not worry if the rest of the sky looks almost black. If your main goal is to capture the Moon itself, preserving its surface detail is more important than brightening the background.
2. Turn Off the Flash
A phone flash cannot meaningfully illuminate the Moon because it is so far away.
Leaving the flash on will not reveal lunar craters or make the Moon look bigger. Turn it off before taking your picture.
3. Avoid Automatically Using Night Mode
Night mode is useful for many low-light scenes, but it is not always ideal for photographing a bright Moon.
Depending on the phone, night mode may combine several exposures or brighten the scene in ways that remove lunar detail. Try the standard Photo mode first, then compare the results.
For more guidance on capturing the night sky, read our related guide: How to Photograph Meteor Showers in 2026.
4. Take Several Pictures
Do not stop after one shot.
Take several pictures with slightly different exposure levels and zoom settings. Check each image by enlarging it on your screen.
One photo may have better focus, while another may preserve more detail. Comparing multiple shots makes it easier to find the sharpest result.
How to Photograph the Moon on an iPhone
You can take a good-looking Moon photo using the standard iPhone Camera app. The exact controls depend on your iPhone model and iOS version.
Follow these steps.
Step 1: Open the Camera app.
Choose Photo mode and point your iPhone toward the Moon. Clean the camera lens first to remove fingerprints and smudges that could make the image hazy.
Step 2: Choose the best available camera lens.
If your iPhone has a dedicated telephoto camera, try it for a closer view of the Moon. If it does not, use the main camera and crop the image later rather than automatically choosing the highest digital zoom setting.
Step 3: Tap the Moon.
Tap directly on the Moon in the viewfinder. This helps the camera focus on the subject.
Step 4: Lower the exposure.
Look for the exposure control, often represented by a sun icon beside the focus box. Drag the control down until the Moon’s surface looks gray instead of pure white.
Step 5: Lock focus and exposure if available.
On many iPhones, touching and holding the focus area activates AE/AF Lock. This can help prevent the camera from repeatedly changing focus and brightness.
Step 6: Stabilize your iPhone.
Rest the phone on a stable surface or mount it on a tripod. Use the camera timer to reduce movement when you press the shutter.
Step 7: Take and compare several pictures.
Try a few exposure levels and available zoom options. Review the results at full size to check whether the Moon’s surface details remain sharp.
Best iPhone Moon Photography Tip
Do not increase brightness just because you are photographing at night. The Moon is a sunlit object, so reducing exposure is often the key to getting a clearer picture.
Also, do not assume that every iPhone has the same zoom capabilities. A dedicated telephoto lens can provide genuine optical magnification, while digital zoom mainly enlarges or crops image data.
How to Photograph the Moon on an Android Phone
Android phones come with a wide range of camera systems. Some have powerful telephoto lenses and manual controls, while others offer only basic camera settings.
The following method works as a starting point on many Android devices.
Step 1: Open the Camera app.
Select the regular Photo mode and frame the Moon. Turn off the flash.
Step 2: Tap the Moon to focus.
Tap the lunar disc on the screen. If your camera offers focus locking, use it to prevent unnecessary refocusing.
Step 3: Lower the exposure.
Move the brightness or exposure slider down until the Moon’s surface becomes visible. Avoid settings that turn the lunar disc into a featureless white circle.
Step 4: Try Pro or Manual mode.
If your Android phone has a Pro mode, you may be able to control ISO, shutter speed, and focus manually.
For a close-up of the Moon, begin with a low ISO and a relatively fast shutter speed. If your phone allows manual shutter control, you might test approximately 1/125 to 1/250 second as a starting range, then adjust based on the result.
The best setting will vary with the Moon’s brightness, your phone’s lens, and the amount of magnification.
Step 5: Use the optical zoom camera if available.
Choose the phone’s actual telephoto lens when it provides a sharper view. Avoid pushing digital zoom to its maximum without checking the image quality.
Step 6: Keep the phone steady.
Use a tripod, a firm support, or another stable surface. A timer helps prevent movement when capturing the picture.
Step 7: Review the image.
Zoom into the captured photograph and check whether the lunar surface has visible detail. If the Moon is too bright, lower the exposure or use a faster shutter speed when available.
Should You Use a Phone’s Moon Mode?
Some Android phones offer a dedicated Moon mode or use computational photography to enhance images of the Moon.
These features can produce visually impressive results, but their performance varies between devices. If you want a more natural photograph, compare Moon mode with a standard photo taken at lower exposure.
Remember that software enhancement is not the same as capturing additional optical detail. Use the method that produces the result you prefer, and avoid assuming that a particular setting works identically on every Android phone.
When Should You Use Zoom and a Tripod?
Zoom and stability can make a noticeable difference when photographing the Moon.
Optical Zoom vs. Digital Zoom
Optical zoom uses a lens to magnify the subject. Digital zoom enlarges or crops the image, which can make the Moon look bigger without revealing additional detail.
If your phone has a telephoto camera, try that lens first. If not, take a sharp picture using the main camera and crop it afterward.
A heavily zoomed, blurry image usually looks worse than a smaller but sharper Moon.
Is a Tripod Necessary?
A tripod is not essential, but it is helpful when you want a sharper image.
At high magnification, even a small movement can make the Moon appear blurry. A tripod or stable phone mount helps reduce this problem.
If you do not have a tripod, rest your phone against a secure, stationary surface. Use a short timer so you do not shake the phone while taking the picture.
For more inspiration, explore our guide to the best nights for meteor showers and stargazing in 2026.
What Is the Best Time to Photograph the Moon?
The best time depends on the kind of photograph you want.
Photographing a Full Moon
A full Moon is bright and easy to locate, making it a good subject for beginners. However, its direct lighting can make some surface features look relatively flat.
Lower your exposure to preserve visible details.
Photographing a Half Moon
A half Moon can be excellent for close-up photography. The boundary between its illuminated and dark portions, known as the terminator, creates shadows that help reveal craters and mountains.
Photographing the Moon at Sunrise or Sunset
When the Moon is near the horizon, you may be able to include buildings, trees, mountains, or other foreground objects.
The Moon may look unusually large at the horizon because of a well-known visual illusion, but it does not physically become much larger simply because it is close to the horizon.
The softer light around twilight can also make it easier to balance the Moon with the surrounding landscape.
For accurate Moon phases and observing information, consult NASA’s Moon resources.
Common Moon Photography Mistakes and How to Fix Them
Even with the right technique, your first few pictures may not turn out as expected. Here are the most common problems and their solutions.
Mistake 1: The Moon Looks Like a White Ball
Why it happens: The camera has overexposed the bright lunar surface.
How to fix it: Tap the Moon and reduce exposure until its surface looks gray and some details become visible.
Mistake 2: The Moon Looks Too Small
Why it happens: The standard phone camera captures a wide field of view.
How to fix it: Use a telephoto lens if available. Otherwise, crop the original image carefully rather than applying excessive digital zoom.
Mistake 3: The Photograph Is Blurry
Why it happens: The phone moves, the camera struggles to focus, or atmospheric conditions soften the image.
How to fix it: Stabilize the phone, tap the Moon to focus, use a timer, and try again when the sky is clearer.
Mistake 4: The Moon Has No Visible Craters
Why it happens: The exposure is too high, the image is heavily zoomed, or the Moon’s lighting does not create strong shadows.
How to fix it: Reduce exposure, use optical magnification where possible, and try photographing a half Moon or gibbous Moon.
Mistake 5: Night Mode Makes the Moon Worse
Why it happens: The phone’s computational processing may brighten or combine the scene in a way that loses lunar detail.
How to fix it: Compare a regular Photo mode image with a night-mode image. Keep the version that preserves the most detail.
Mistake 6: The Image Looks Grainy After Editing
Why it happens: Excessive cropping, sharpening, or brightening can make image noise more noticeable.
How to fix it: Start with a sharp original, crop moderately, and make small adjustments to highlights, contrast, and sharpening.
How to Edit Moon Photos for Better Results
You do not need complicated editing software to improve a Moon picture.
Use your phone’s built-in photo editor or a trusted editing app.
Start with these adjustments:
- Highlights: Reduce them if the brightest areas look washed out.
- Exposure: Make small adjustments to preserve the Moon’s surface.
- Contrast: Add a little contrast to separate light and dark lunar features.
- Sharpness: Apply modest sharpening without creating artificial-looking edges.
- Crop: Remove unnecessary empty space while keeping the Moon’s shape natural.
Avoid editing so aggressively that the Moon looks unrealistically textured or its colors become unnatural.
If you are preparing a photograph for social media, save a full-resolution original before cropping or applying filters.
Frequently Asked Questions
1. How do you photograph the Moon with a phone clearly?
Tap the Moon to focus, reduce exposure until its surface is no longer white, turn off flash, and stabilize your phone. Use optical zoom if available and take several photographs to compare sharpness.
2. What are the best iPhone settings for Moon photography?
Start in Photo mode, tap the Moon, lower exposure, and use a tripod or stable surface. If your iPhone supports a telephoto camera, try it for a closer view. Exact settings depend on the model and lighting conditions.
3. What are the best Android camera settings for photographing the Moon?
Use low ISO and a relatively fast shutter speed if your Android phone offers manual controls. Tap the Moon to focus, reduce exposure, and choose optical zoom where possible. Adjust the settings based on the resulting image.
4. Why does the Moon look blurry on my phone?
Blur can result from camera movement, excessive digital zoom, poor focus, haze, or atmospheric turbulence. Stabilize the phone, clean the lens, reduce unnecessary zoom, and try again when visibility improves.
5. Should I use night mode to take pictures of the Moon?
Not necessarily. Night mode can help with dark landscapes, but it may overexpose the Moon or soften its details. Compare it with standard Photo mode and choose the sharper image.
6. Can I photograph the Moon without a tripod?
Yes. Rest your phone on a stable surface and use the camera timer. A tripod is useful for close-ups, but it is not required for every Moon photograph.
7. Which Moon phase is best for seeing craters in phone pictures?
A half Moon or gibbous Moon can show more pronounced shadows around craters and mountains. A full Moon is bright, but direct illumination can make some surface features appear flatter.
8. Can a smartphone capture the Moon’s actual surface details?
Many modern smartphones can capture some visible lunar features, especially with a telephoto lens and careful exposure. However, fine details depend on the phone’s optics, sensor, magnification, atmospheric conditions, and processing.
9. Do I need a special Moon photography app?
No. The standard camera app is enough to get started. A third-party camera app may help if you need manual exposure, focus, or RAW capture that your built-in app does not provide.
10. Is the Moon bigger when it is near the horizon?
It can appear larger because of the Moon illusion. Its apparent size does not dramatically increase just because it is close to the horizon, although a low Moon can create beautiful photographs when framed with foreground objects.
Final Thoughts
Learning how to photograph the Moon with a phone is mostly about controlling brightness, choosing the right zoom, and keeping the camera steady.
Start with the camera app already installed on your iPhone or Android phone. Turn off flash, tap the Moon, lower exposure, and take several pictures. If you have a tripod or a phone with optical zoom, experiment with those features to improve your results.
You may not capture telescope-level detail with every smartphone, but you can still create beautiful Moon photographs without expensive equipment.
The most important tip is simple: do not make the Moon brighter. Make its details easier to see.
- NASA: How to Photograph the Moon
- NASA: Lunar Photography Guide
- CSIRO: How to Photograph the Moon With Your Phone
Place relevant external links naturally within the article, and ensure that all internal links lead to live, published pages.